
So, let’s say you want to use clang to do some AST analysis on Windows. You did a simple search, and downloaded the installer from LLVM project site. Everthing went well, until you found there is something missing in the installed LLVM headers folder
|
1 2 3 4 5 6 7 8 9 10 11 12 13 |
PS C:\Program Files\LLVM7\include> tree /f C:. ├─clang-c │ BuildSystem.h │ CXCompilationDatabase.h │ CXErrorCode.h │ CXString.h │ Documentation.h │ Index.h │ Platform.h │ └─llvm-c lto.h |
Perhaps you haven’t noticed anything. In most cases that’s fine, but unfortunately I’m compiling ccls, which needs the AST parsing functionality offered by Clang. Obviously, they decided to exclude this part of the feature in the packed installer.
Then, well, I have no choice but to compile LLVM & Clang by myself.
I have VS2017/2019 on my hand, and here is the official guide: Getting Started with the LLVM System using Microsoft Visual Studio.
Though I’m totally agree that you need to read the documentation (twice), here is basically what you need to do
- Download & install CMake toolchain. We need cmake-gui and we will generate a VS Solution with 200+ vcxproj files.
- Download source code as what the documentation says.
- If you are downloading source code from LLVM download page, please please please ensure to copy Clang source code to LLVM_ROOT_PATH\tools\clang
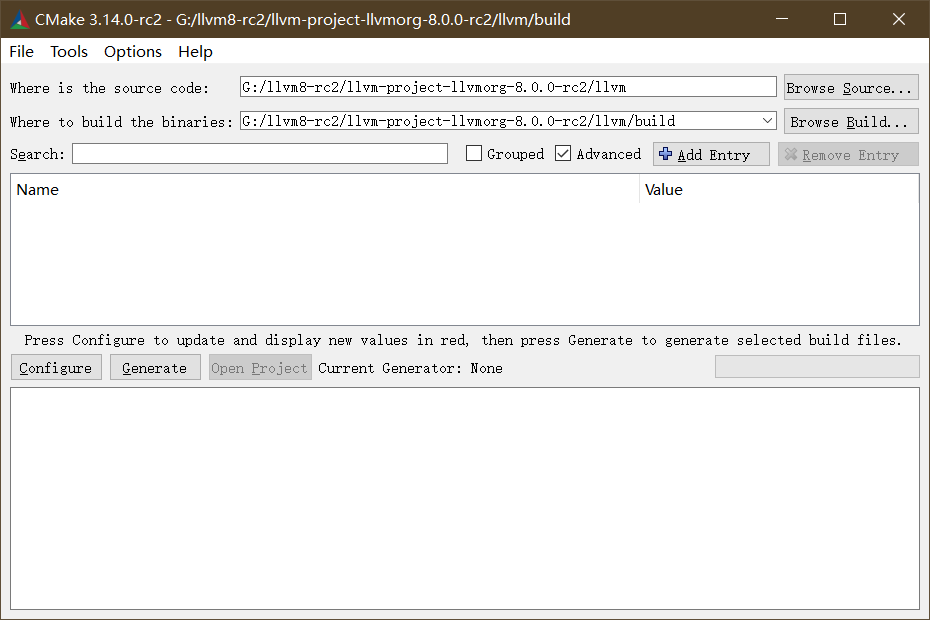
- Open cmake-gui. Though it should work properly without VS environment variables, you may try to open cmake-gui explicitly from VS developer commandline (x64) if you find cmake having trouble searching for your MSVC compiler.
- enter the path of your source code, and the path to place generated VS Solution & built binaries. Then click “Configure”

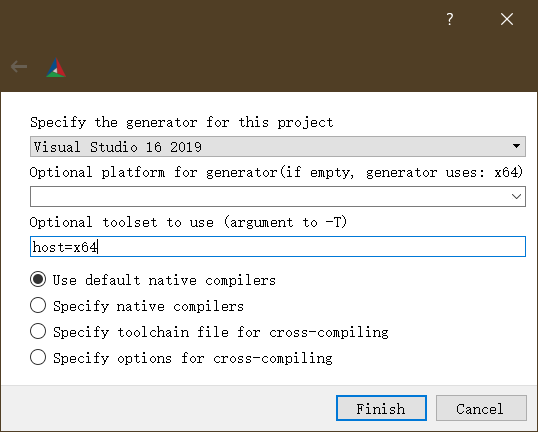
- For x64 toolchain, we fill host=x64 in the -T arguments. Click “Finish” to continue
- Wait a moment until CMake configuration completes
- In the build parameters list, fill “X86” for
LLVM_TARGETS_TO_BUILD. This is actually for x64 architecture. Note the parameter is case-sensitive.- For more architectures supported by the source code (ARM, MSP430, WebAssembly, etc.), see the lines starting with “Targeting” in the output box.
- Click “Generate” to generate Visual Studio projects.
- Do not click “Open Project” now, because the build is likely to fail due to the absence of
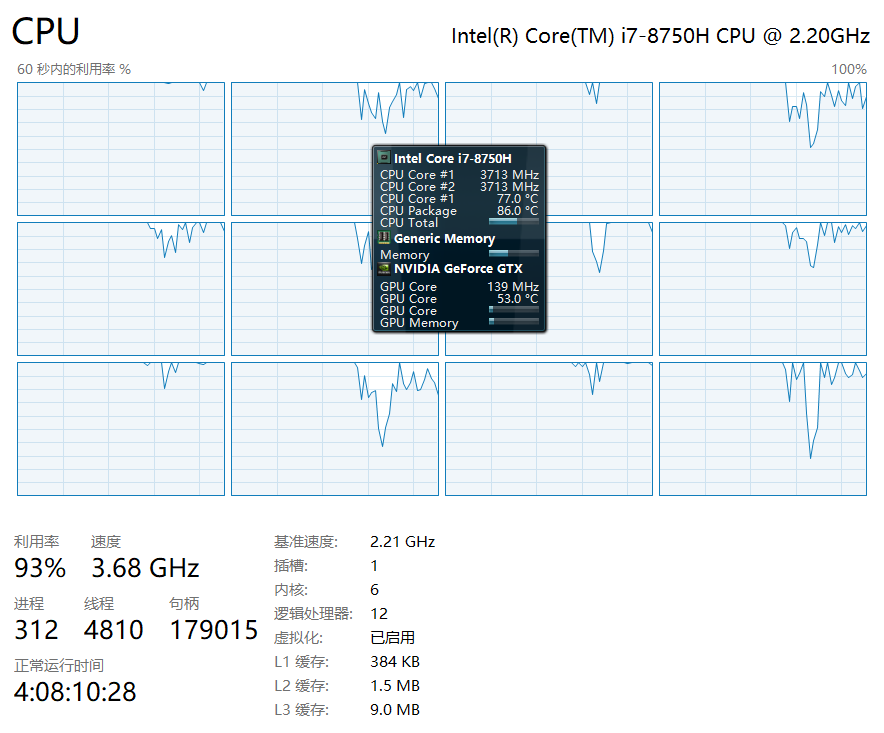
VSINSTALLDIRin the environment. Instead, open x64 Native Tools Command Prompt for VS, then enter devenv to open Visual Studio from the console. - Ensure you have enough physical memory. Close Chrome if necessary. I have 16GB RAM in total, and ~10GB free at that moment. Nevertheless, the page file is still abused. It definitely helps if your page file is on SSD; so is your LLVM+Clang building directory.
- Choose a build configuration (
DebugorRelWithDebInfo). On projectALL_BUILD, right-click, then “Build Project”. You do not need to build the whole solution.- As an alternative approach (and to save ~1GB RAM), you can build the project with MSBuild directly from the command prompt you just opened. Use
-mto explicitly specify the max concurrency level
1PS G:\llvm8-rc2\llvm-project-llvmorg-8.0.0-rc2\llvm\build> msbuild .\ALL_BUILD.vcxproj -m:6 -p:Configuration=RelWithDebInfo
- As an alternative approach (and to save ~1GB RAM), you can build the project with MSBuild directly from the command prompt you just opened. Use
- Grab a coffee. Wait for the build. It took me about 15min to build V7.0.1 source code from official downloads, and 35min to build V8.0.0-rc2 from GitHub repo. The build abuses CPU, RAM, and your disk. So get prepared. The intermediate files and built binary took ~70 GB disk for Debug + RelWithDebInfo builds.
- On project
INSTALL, right-click; then “Build Project”. All the binary, library, header stuff should be copied to your C:\Program Files\LLVM folder when it completes. Remember to rename the folder before you INSTALL a different configuration, or the old folder will be replaced.
Yep. Now I have everything I need.
|
1 2 3 4 5 6 7 8 9 10 11 12 13 14 15 16 17 18 19 20 21 22 23 24 25 26 27 28 29 30 31 32 33 34 35 36 37 38 39 40 |
PS C:\Program Files\LLVM\include> ls Directory: C:\Program Files\LLVM\include Mode LastWriteTime Length Name ---- ------------- ------ ---- d----- 2/24/2019 10:19 PM clang d----- 2/24/2019 10:19 PM clang-c d----- 2/24/2019 10:19 PM llvm d----- 2/24/2019 10:19 PM llvm-c PS C:\Program Files\LLVM\include> ls clang Directory: C:\Program Files\LLVM\include\clang Mode LastWriteTime Length Name ---- ------------- ------ ---- d----- 2/24/2019 10:19 PM Analysis d----- 2/24/2019 10:19 PM ARCMigrate d----- 2/24/2019 10:19 PM AST d----- 2/24/2019 10:19 PM ASTMatchers d----- 2/24/2019 10:19 PM Basic d----- 2/24/2019 10:19 PM CodeGen d----- 2/24/2019 10:19 PM Config d----- 2/24/2019 10:19 PM CrossTU d----- 2/24/2019 10:19 PM Driver d----- 2/24/2019 10:19 PM Edit d----- 2/24/2019 10:19 PM Format d----- 2/24/2019 10:19 PM Frontend d----- 2/24/2019 10:19 PM FrontendTool d----- 2/24/2019 10:19 PM Index d----- 2/24/2019 10:19 PM Lex d----- 2/24/2019 10:19 PM Parse d----- 2/24/2019 10:19 PM Rewrite d----- 2/24/2019 10:19 PM Sema d----- 2/24/2019 10:19 PM Serialization d----- 2/24/2019 10:19 PM StaticAnalyzer d----- 2/24/2019 10:19 PM Tooling |
You said…
> Download source code as what the documentation says.
>
> If you are downloading source code from LLVM download page,
> please please please ensure to copy Clang source code to
> LLVM_ROOT_PATH\tools\clang
Can you elaborate? I pulled down the source code, and I have two directories – llvm-10.0.0.src and clang-10.0.0.src. The clang directory has a dozen subdirectories. Where is the “source” that I need to move to LLVM_ROOT_PATH\tools\clang?
Thanks
@Bill Waters I think you just need to put the repo root of clang inside LLVM_ROOT/tools/clang, such that files like LLVM_ROOT/tools/clang/ModuleInfo.txt exists.
Do you mean I should copy this https://github.com/llvm/llvm-project/tree/main/clang here?
@mingy Yes. At least I meant so back in 2020 🤔