
ccls is an awsome LSP implementation on C/C++/OC written by MaskRay. It also has a plugin on VSCode, providing intellisense on these languages. In this post I’m demonstrating a simple approach to configure and build ccls with MSVC on Windows.
Build LLVM & Clang first
First, you need to ensure you have a LLVM+Clang installation with required AST-related headers. In MaskRay/ccls/src/indexer.cc, we have
|
24 25 26 27 28 29 30 31 32 |
#include <clang/AST/AST.h> #include <clang/Frontend/FrontendAction.h> #include <clang/Index/IndexDataConsumer.h> #include <clang/Index/IndexingAction.h> #include <clang/Index/USRGeneration.h> #include <clang/Lex/PreprocessorOptions.h> #include <llvm/ADT/DenseSet.h> #include <llvm/Support/CrashRecoveryContext.h> #include <llvm/Support/Path.h> |
Unfortunately, this is not the case for the official installers.
The Windows prebuilt binaries lack C++ header files, thus they cannot be used.
So you will need to build LLVM+Clang locally with Visual Studio.
Then build ccls
Now that you already have CMake installed (Yes I’m sure you have), we can come back to the topic. This is what I did to prepare the repository
|
1 2 3 4 5 6 7 8 9 10 11 12 13 14 |
PS G:\> git clone https://github.com/MaskRay/ccls --depth 2 Cloning into 'ccls'... remote: Enumerating objects: 234, done. remote: Counting objects: 100% (234/234), done. remote: Compressing objects: 100% (184/184), done. Receiving objects: 100% (234/234), 216.44 KiB | 814.00 KiB/s, done.eceiving objects: 99% (232/234) Resolving deltas: 100% (123/123), done. PS G:\> cd ccls PS G:\ccls> git submodule init Submodule 'third_party/rapidjson' (https://github.com/Tencent/rapidjson) registered for path 'third_party/rapidjson' PS G:\ccls> git submodule update Cloning into 'G:/ccls/third_party/rapidjson'... Submodule path 'third_party/rapidjson': checked out '6a905f9311f82d306da77bd963ec5aa5da07da9c' |
Then open cmake-gui, fill in the necessary information, click “Configure”. The default values look good to me.
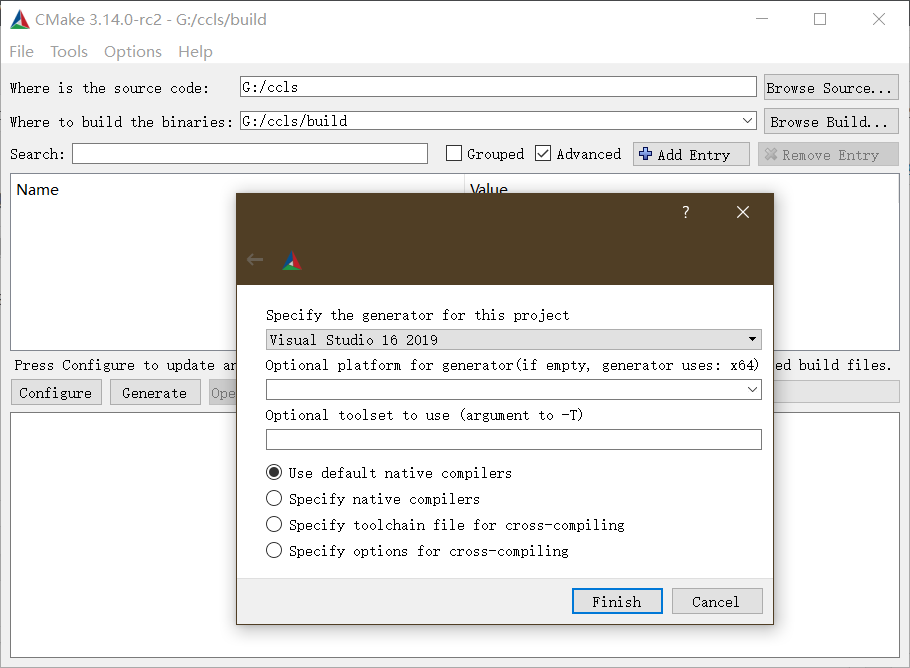
If your LLVM is placed in the default directory (C:\Program Files\LLVM), the script should be able to find it. Otherwise, you need to click “Add Entry” and specify your LLVM path in CMAKE_PREFIX_PATH BEFORE clicking “Configure” button.
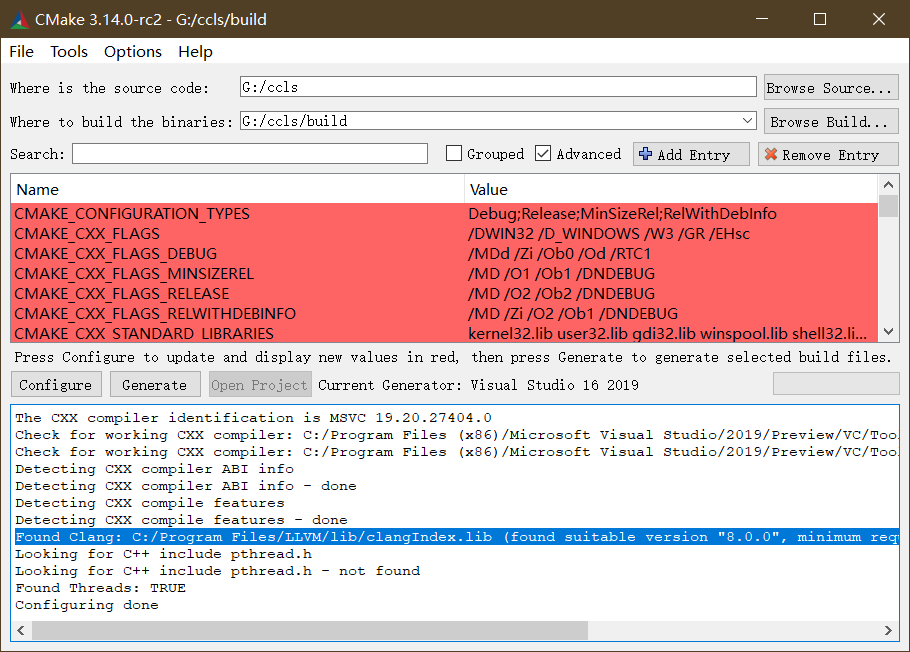
Click “Generate” to generate the Visual Studio Solution for ccls. Then “Open Project”.
You know what to do next. Choose a configuration (Debug / RelWithDebInfo), then build ccls. This should be enough. You will find ccls.exe in your target folder.
Then you can use it to power your ccls plugin in VSCode.